Practical Assessment
Task List
This practical assignment must be successfully completed by midnight on Friday, August 08, to comply with the OPS145 Course Promotional Policy for Summer 2025. Each successful submission will receive a confirmatory email. Multiple attempts are permitted until midnight on Friday, August 08. Only successfully completed practical assessments will receive credit.
Complete all tasks listed below on this Minimal Ubuntu 24.04.2 LTS VirtualBox virtual machine. The link password to download is ubuntu, and the password to log in as user ubuntu is also ubuntu.
Change the default console font to TerminusBold 12 x 24.
Create a user having the same username as your MySeneca username.
Log in as your MySeneca-named user and run these non-admin commands: whoami, hostname, and id.
While logged in as your MySeneca-named user, log in to matrix and run the same commands (whoami*, hostname, and id**) on matrix, note differences in output from each command on matrix when compared to the output of the same command on Ubuntu. Then, log out from matrix and subsequently from Ubuntu.
Configure your MySeneca-named user to be a member of the sudo group.
While logged in as your MySeneca-named user, use sudo to complete the admin-related activities described next.
Bring all installed packages up-to-date.
Install the OpenSSH server package and configure the installed SSH server to:
- Start up at boot time.
- Prevent the root user from using SSH to log in to this virtual machine.
- Ensure SSH server is running at the time of submission.
Using your MySeneca-named user account from the host operating system (Windows on college computers), SSH into this virtual machine. SSH from Windows is possible after you have configured port forwarding in the network settings of this virtual machine. To change network settings of the virtual machine, shut down the virtual machine first.
Do not change the network adapter on this virtual machine from NAT to another network type, as that will make your configuration invalid and the submit check script prevents invalid configurations from submitting. Instead, configure the network address translation (NAT) settings to allow a source port greater than 1024 to forward traffic to destination port 22.
Restart the virtual machine and after the virtual machine has started up, from the Windows command line log in using your MySeneca-named user account into this virtual machine. Confirm that you have successfully SSHed into the virtual machine from Windows by running the non-admin commands listed earlier. In addition you could SSH into matrix and run the same commands, noting the differences in output. After you confirmed you were successful in logging in to matrix from the Windows command line using the Ubuntu virtual machine as a intermediary step, logout from matrix.
From your MySeneca-named user account while logged in to Ubuntu (not matrix), complete the submission as described in the next section.
- After a successful submission, learn how to shut down and reboot your system from the command line.
Submission
Submit your work before midnight on Friday, August 08. To submit, log in as your MySeneca-named user and run the submit command from the command line. Follow the prompts, correcting error states until you see the "Congratulations" message. If the virtual machine has been configured as requested, your submission will be completed, and you receive an email notification confirming the submission.
Advice
Not all steps required to complete the practical assessment are provided on this wiki page. Please use the information below as a guide and reference material, rather than viewing it as a step-by-step recipe to achieve the desired state configuration.
Tip 1: Download and import Ubuntu 24.04 virtual machine
In this investigation you will be downloading and importing a pre-configured Ubuntu minimal virtual machine (VM). A minimal installation has limited software installed. In this case, packages you are used to using such as VIM and Nano aren't present. You will want an external drive to save your virtual machine on.
Download the virtual machine using the following link. Password for the download file link is ubuntu. Password for user ubuntu is ubuntu.
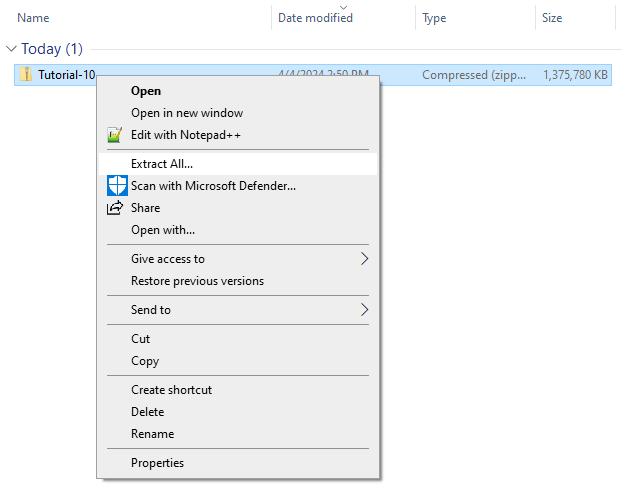
Extract the VM using the File Explorer in Windows. Browse to the file (likely in your Downloads folder), right click on it and click extract.
On a College PC:
- launch MyApps and login.
- In the search bar, search for virtualbox
- Select virtualbox and click launch
- Add the VM (Click on the Add button and browse to the VM you extracted)
- Power on the VM
- Login using the following credentials:
- Username: ubuntu
- Password: ubuntu
On Your PC: Download Virtual Box and install it.
- Launch virtualbox
- Add the VM (Click on the Add button and browse to the VM you extracted)
- Power on the VM
- Login using the following credentials:
- Username: ubuntu
- Password: ubuntu
One of the first things you do on a new system is install software and update the system. Your first step to installing software should always be to test your Internet connectivity, as without a working connection you cannot resolve anything. To do this we can use the tool ping, which is commonly used to troubleshoot network connectivity issues.
Useful addresses to ping to verify network connectivity are the following:
If that fails, you could try pinging:
8.8.8.8, or 8.8.4.4
Your default gateway
8.8.8.8 and 8.8.4.4 are two publicly available DNS servers Google provides for free use. You can use these to test external network connectivity. For example, if pinging www.google.com fails, but pinging 8.8.8.8 succeeds it is likely you have an issue with DNS resolution.
If pinging 8.8.8.8 also fails, the problem is likely on your local network. You could try pinging your default gateway to confirm whether it is reachable or not. Common issues are:
- Wrong default gateway configured
- Default gateway is down
- Unplugged or broken network cable
Since you are dealing with a virtual machine, unplugged or broken cables aren't an issue. The other two are still possible.
Ping www.google.ca. Proceed to the next step only if it is successful.
ping www.google.ca
Next, verify your IP address configuration.
ip a
Notice you have two NICs (Network Interface Cards).
- lo which is your loopback, and is assigned the IP address 127.0.0.1/8 by default
- enp?s? where ?? represents two digits: ie enp0s3. This is the NIC connected to the virtual network, which allows communication between your VM and the Internet through your Host PC.
Now, lets look at your routing table. Your routing table tells you what networks your VM knows about, as well as the default route. The default route is where packets are sent when they don't match any other entry in your routing table.
ip route
Viewing your IP address configuration and routing table can be useful tools for troubleshooting network connectivity issues. Ping and traceroute are useful tools for verifying a particular destination is reachable. Traceroute has the added benefit of showing you where the packets are failing.
Use the following command to switch to root. Issue the password (ubuntu) when prompted.
Tip 2: System Administration
In this investigation, you will add a user, give your new user access to sudo, install software & ssh into Matrix.
Create a user with your MySeneca username:
sudo adduser senecausername
Follow the prompts on screen to:
- give yourself a password
- set your full name
Previously, you used the su command to switch to root. You can also use this to switch to any other user temporarily. You will now use this to switch to your user, to test it. Issue the following command:
su - senecausername
Issue the following commands and record the output:
- ls
- ls -l
- hostname
- pwd
- whoami
whoami should output your username. sudo whoami will not execute, as your user hasn't been given sudo access. Type exit to return to the ubuntu user.
Add your user to the sudo group using the following command as an example.
sudo usermod -aG sudo senecausername
Switch to your user again, and issue sudo whoami. It should work this time.
Issue the following command to update your terminal font.
sudo dpkg-reconfigure console-setup
Set the font to Terminus 12 x 24. Save and exit. Reboot to apply your changes.
Login to your Ubuntu system.
Now that you have confirmed your Internet connection and granted your user sudo access, it's time to use this new power wisely. Update the system using apt:
sudo apt -y update
Once that has completed, install the following packages with the command sudo apt install followed by the package names (separated by a space):
- vim
- nano
- man-db
- mandoc
- tldr
sudo apt install vim nano man-db mandoc tldr
Answer yes when prompted. Note the difference between using apt with and without the -y option.
Create the .local/share directory for use with tldr.
mkdir -p ~/.local/share
Test the installed packages as you wish. man-db and mandoc added the man utility, which you learned about previously.
You are going to SSH to Matrix from the command line. If you are using a Seneca PC, you do not need the Global Protect VPN. If you are using your VM on your Laptop or at home, you will require the Global Protect VPN installed and running on your host system before you proceed.
Test SSH to Matrix from the command line:
ssh senecausername@matrix.senecapolytechnic.ca
Disconnect from Matrix.
On your Ubuntu VM switch to root and run this command to submit:
submit
Follow the prompts. You should receive an on screen and email confirmation indicating Tutorial 10 has been completed.
Once it has completed, you will need to shutdown the system.
| Command | Description |
|---|---|
| reboot | will reboot the system |
| poweroff | will shutdown the system |
Issue the following command to shutdown the system.
poweroff
Linux Practice Questions
- How can you use ping to test network connectivity?
- What does the command ip a do?
- What does the command ip route do?
- Why is an Internet connection necessary for updating Linux and installing software?
- What package manager does Ubuntu use? What is a package manager used for?
- How to you execute a command with elevated (root) privileges?
- What does adduser do?
- What is the sudo group?
- How do you switch users from the command line?
- Why choose source port greater than 1024 when doing port forwarding on NAT?
- Why choose destination port 22 for SSH when doing port forwarding on NAT?
- What are the other types of network adapters in VirtualBox? How does each of them change the setup to SSH from host OS in to the VirtualBox VM as compared to NAT with port forwarding?